Overview
This quick setup guide provides new and existing users with four key steps to unbox and install your devices (e.g., Elemental Gateway and Elements) so you can start using your Elemental Machines lab monitoring system. Some actions can be performed differently, but we suggest following the steps for new installations.
At any point in the setup process, please direct any questions to help@elementalmachines.com to quickly submit a ticket to address your concern.
Step 1: Pre-installation
Before receiving the products in the mail, a “ Welcome to Elemental Machines" email will be sent from help@elementalmachines.io that contains a link to set up a password to access your dashboard account. To login to your account, go to dashboard.elementalmachines.io/sign_in and use the email and password already created.
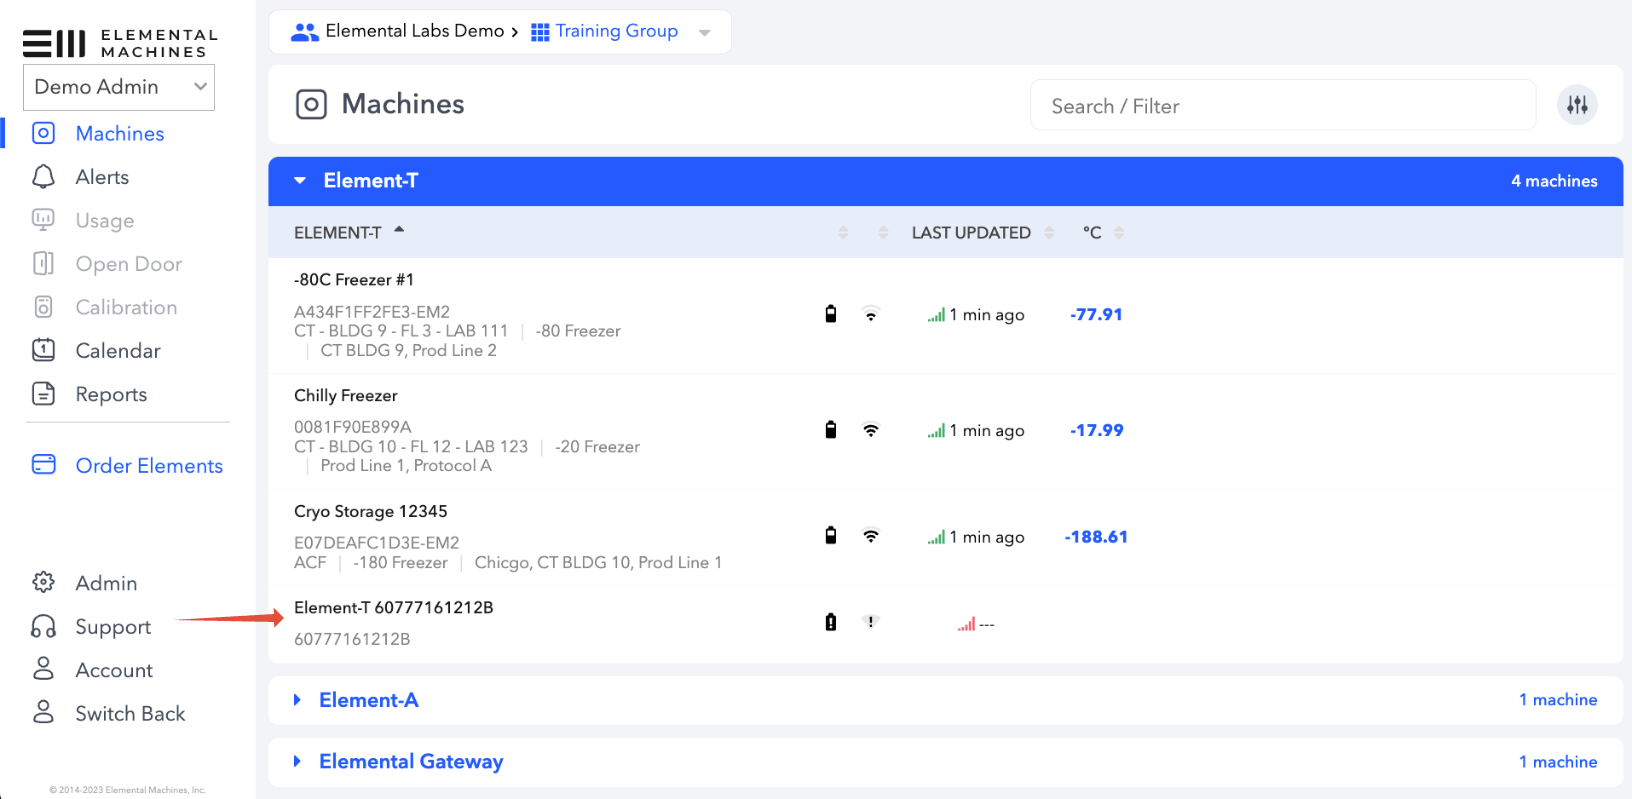
For new customers, all your devices will be added to your Elemental Insights Dashboard account with the serial number as the default name. Each Element will be listed under the Machines menu tab with a 'disconnected' status.
For existing customers, any new Elements will be added to your top-level customer group. An Administrator or Manager of the account can then allocate the Elements to the necessary group(s) by following the instructions in this video.
Step 2: Unboxing
Enclosed in your shipment are the Elements and Gateways with a packing slip. First, we suggest you assemble and power up the Gateway(s). For specific installation details, see Step 3 in this guide. Elemental Machines offers three versions of Gateways: GW1 (also known as Tablet Gateway), GW2, and GW3. Elements that connect to the Gateway, such as Elements T, A, B, and U, will be ready to be installed once your gateways are online.

Element C and D devices connect directly to a WiFi network and do not communicate through the Gateway. These devices have to be plugged into an electrical outlet and powered on using the specific cabling included in your order for installation (please refer to the specific installation guides). Element T, Element A, Element B, and Element U are battery-operated and do not require any power cables.

Step 3: Installation of the Gateway(s)
Please refer to the GW3 User manual for additional details. If you have a GW1 or GW2, please navigate to the appendix for setup instructions. Before connecting your gateway to a wifi network, please see the Platform Network Summary, which provides further information about IT security.
- Assembling the Gateway – Before powering on the Gateway, if the device does not have the antennas installed, screw the two provided antennas in the antenna ports by rotating them clockwise.

NOTE: Antennas should be finger-tight. Do not use pliers or other tools to tighten.
- Powering on the Gateway – Plug the provided wall adapter into an AC outlet, plug the round (barrel) connector into the Gateway, and flip the switch as indicated. When the switch is turned on, the power indicator light will glow white. The Cellular, WiFi, and Battery indicators will also illuminate to indicate their status.

- Connect the Gateway to your Network – After the device has been powered on for a few minutes, follow the steps in the WiFi Connection guide to connect the GW3 to your desired network.
The GW2 and GW3 versions of the gateway offer the option to connect the device to a network via ethernet, while Gateway 1 allows connection via WiFi only. To connect the GW2 or GW3 to the network with an ethernet cord, insert an ethernet cord directly into the RJ-45 jack on the Gateway. Ensure the cord’s locking mechanism has engaged fully after installation by gently tugging the line, which should remain firmly in the ethernet jack.
NOTE: The GW3 must be connected to a valid WiFi or ethernet network before it will start collecting data from the nearby Elements. If no WiFi network is available or you plan on just using the ethernet connection with no WiFi backup, please reach out to help@elementalmachines.com.
Step 4: Installation of Elements
Here we provide step-by-step instructions to install an Element T. The steps are similar for all battery-powered Elements (e.g., Element A, Element U, and Element B). Please see each Element's specific user manual if you require additional details for installing other aspects.
- It is recommended that all wireless Elements be installed within approximately 30 feet of a Gateway, as close to the front of the equipment as practical to ensure optimal communication with the Gateway.
- The Elements have built in magnets for easy mounting on metal surfaces.

- Power the Element T by removing the battery pull tab as shown above.
- NOTE: Element A devices are shipped with the power on and do not need to be activated.

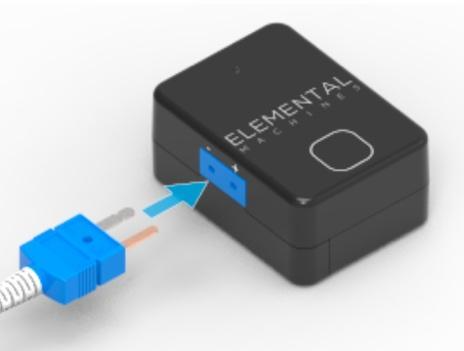
- Plug the thermocouple probe as shown above into the side of the Element T, being sure to match the copper and silver prongs to their same-colored receptacles on the device.
- Thread the other end of the thermocouple wire through the two holes on the side of the provided donut-shaped magnet, then loop it through the larger hole, making sure to leave about an inch of wire at the end.
- Install the Element T on the side of the refrigerator/freezer. We recommend installing the Element T on the hinge side of the door and threading the thin thermocouple wire through the door hinge, ensuring the door seals when closed.
- Attach the magnet to the wall of the refrigerator/freezer or on the bottom of a shelf rack. If no magnetic surfaces are present, we recommend using Kapton tape to secure the thermocouple, leaving the tip of the thermocouple open to the air and not pressed against the side to ensure accurate temperature measurement.
- Optional: using a sharpie, write the name or location of the asset being monitored on label of the Element in case the device gets misplaced.

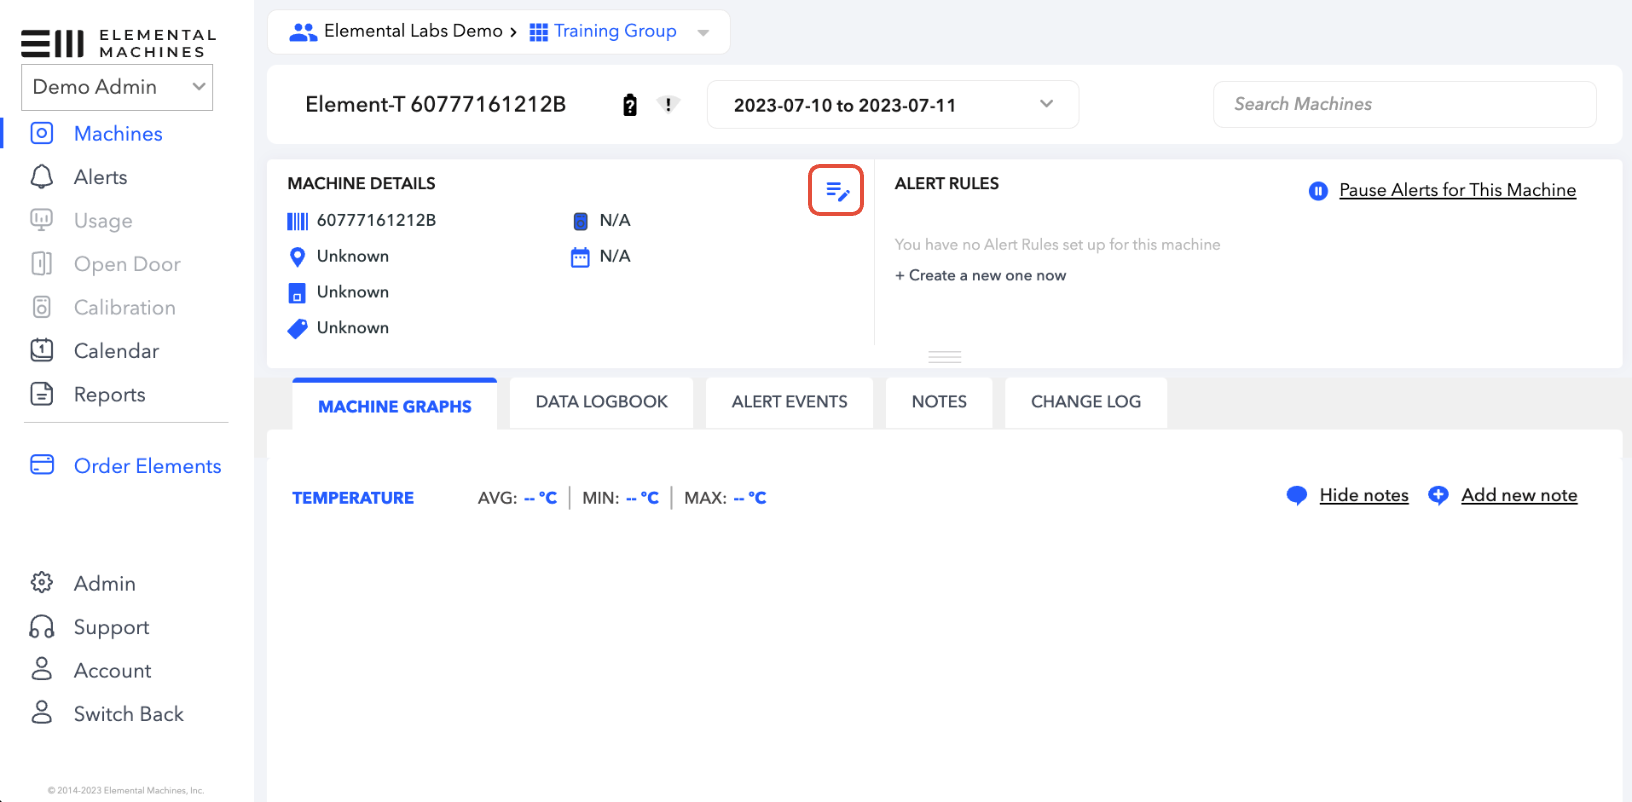
You can edit the Element details on the dashboard to include the name, location, and equipment type of the asset that is being monitored by the device. Adding location and equipment tags helps keeps your dashboard organized and makes it easier to set up alert rules. Follow these steps to make the necessary edits:
- Click on the device that you would like to edit

- Click on the Edit Machine Details Icon

- Enter the asset name, equipment category, and location, along with any other pertinent information. Then scroll to the bottom of the page and click "Save"

NOTE: Only accounts with Admin and Manager roles can make changes to devices. Accounts with Users roles must contact an account with higher privileges to make such changes.
Please check out the Dashboard User Guide for more information on how to complete your dashboard setup.

